I've been wanting to make a DC Metro station name pylon costume for a while, and figured that this was my last Halloween to do one as a preview of the Phase 2 Silver Line stations before they open (supposedly Summer 2021). And theoretically, it's just a painted box with letters on it, so how hard could it be?
Inspiration
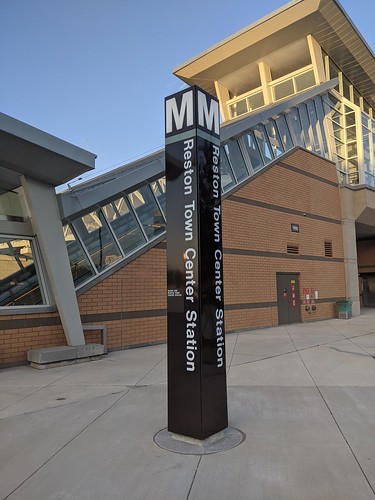
I was originally going to do the Reston Town Center Station, but decided to go with the shorter-named Herndon Station so the letters would fit better. I didn't want to do a fully enclosed, wearable costume (though you'd just need a big appliance box), and I decided to wear it as a headpiece, since I could reuse the helmet box mount I'd used in previous years.
That was a mistake.
It probably wouldn't have been as big of a mistake as it turned out, except I decided to make it about 4 feet tall. Great for final proportions, terrible for weight distribution and balance.
The Build
For the main structure, I went with USPS Priority Mail Flat-Rate Medium boxes. (Foam core board probably would have been smoother and lighter, but the boxes were free and I already had a bunch of them.) Instead of just stacking the boxes and gluing them together, I glued the bottom flaps of each upper box to the top flaps of the lower box, effectively doubling the height of each one. (Mistake.)
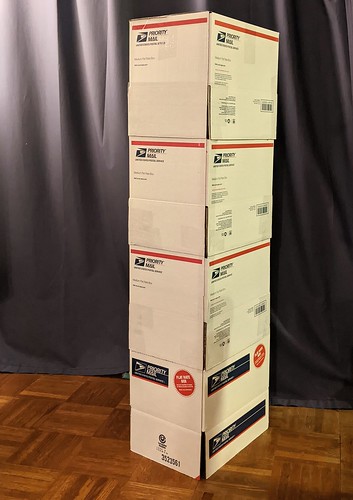
I also hot-glued braces on the inside corners.

This, in turn, led to a hot-glue injury, a small second-degree burn on my finger that I made worse by peeling off the glue, and with it, the top layer of still-forming blister. (I ended up using a series of waterproof bandages to encourage scabless healing.)

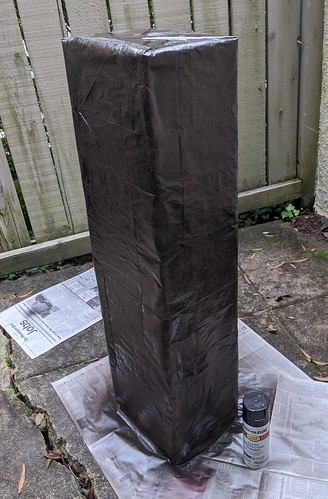
I then took apart a Home Depot yard waste brown bag and wrapped the box with it, then sprayed it with a few coats of Rustoleum Satin Dark Walnut paint:
Decoration
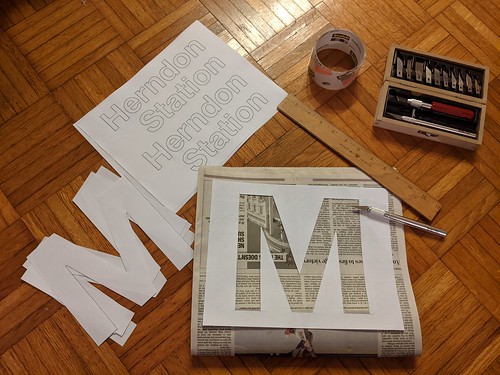
Next, for the lettering, I checked with WMATA's brand and style guide [PDF]; they mostly use Helvetica Neue; I printed the letters out: the big Ms on regular white printer paper, and the Herndon Station letters on sticker paper.
Cutting out the big Ms was easy; however, I made it through the first two smaller letters (from of the first of four sets I'd need) when I realized that there was no way in hell I'd be delicately Exacto-knifing out all that.
I quickly realized that going to Office Depot and getting the white letters printed on a matching dark brown background would work almost as well. (There was a side attempt to print the white letters on transparencies, which I think is possible, but my first attempt went nowhere and I didn't pursue it.)

I cut out each word as a single unit and used spray adhesive to glue them down (as well as the big Ms, which I'd reprinted on cardstock). The Silver Line band was simply duct tape (of course). The first attempt looked like this:

The next day, I realized that it didn't look right: the "Herndon Station" labels were too small overall; plus, most of the Stations were crooked, and the station names weren't aligned with the edge of the big M on the wide sides (on the actual pylons, all four sides are equal width; my helmet box mount's sides were longer than the front and back).
I did a re-do, going back to Office Depot to reprint the Herndon Station letters on ledger-size (11x17) cardstock, making sure to align the words and tape them together before gluing them down. (Even with multiple attempts, color, and cardstock, the total printing cost was just over $5.)
The Result
The final result, which you can see next to the real-life Herndon Station pylon (right off Herndon Parkway) looks pretty okay (seen here with a little forced perspective):
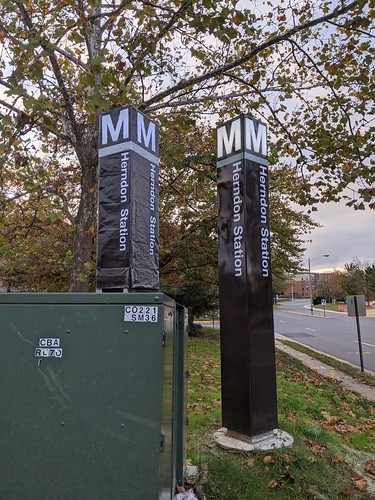
A better size comparison:
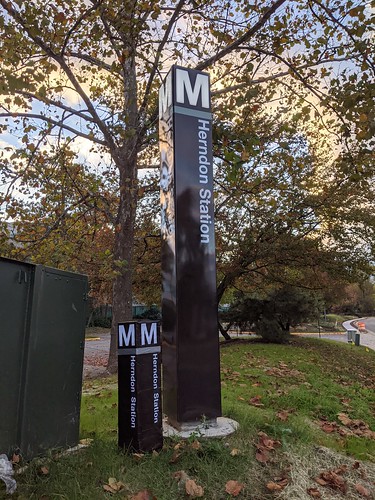
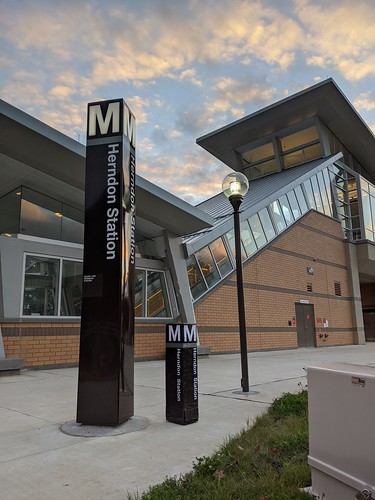
The other pylon is over by the station entrance. Also, don't talk to me or my son ever again:
Now, as I was trying to take a selfie while wearing my costume next to the real pylon, I realized what a mistake I'd made: Just like with my JLENS blimp costume from 2015, I'd underestimated how heavy and unwieldy wearing something like this—even something that's just cardboard, paper, and paint—would be.
The expression on my face is a grimace as I'm trying to get the angle right while the costume torques my head and drags at my scalp while the chin strap digs into my neck:

Because of the overall height, you can't really wear it indoors. In non-COVID times, it'd be more of a problem, though right now, consider it an incentive to stay outside.
Lessons
The main issue is that it's just too uncomfortable to wear as a headpiece; I probably wore it for less than 10 minutes over the entire night. It'd work much better with a backpack mount (possibly a heat-gun-bent-pvc frame, bungied to a pack frame, or even just stuffed into a knapsack). I need to remember that if I'm ever tempted to do a head-mounted costume again (or at least, one that doesn't need to look like a halo neck brace).
Other than that:
- While the satin spray paint was a pretty good color match (with a nice glossy sheen), the lines from the paper bag were pretty prominent (even after I tried to iron them flat), so use paper from a roll or big sheet without any creases.
- I considered spraying it with clear coat to improve durability, but decided it wasn't necessary for a single outing.
- Printing your lettering at a print shop is pretty cheap and you can do the layout and design at home, pay online, and pick it up at the store.
- If you want to get fancy, the big Ms on the real pylons are lighted.
Materials:
Cardboard (boxes or sheets)
Craft paper (preferably rolls)
Glue (hot glue for the structure, spray for the lettering)
Spray paint (Rustoleum Satin Dark Walnut or equivalent)
Duct tape (color-matched to the Metro lines you need)
Lettering printed on cardstock or heavier paper at your print shop of choice (especially if you don't have the skill or patience to paint or cut out all those letters)
Mounting system: I velcroed the headpiece to a head mount (just a box secured to a bicycle helmet), though use a backpack unless you can really get the weight down. And test it first!


